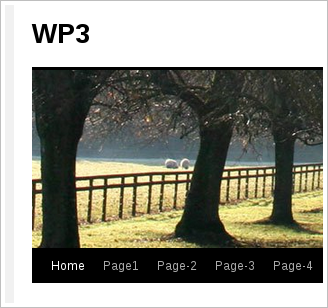
The Twenty-Ten theme by default supports just 1-menu. Ofcourse, several menu's can be created but just one menu can be used as primary navigation, and at a single location.
In this tutorial, I'm using a child-theme(based on twenty-ten) which has its own functions.php file and where the new menu / navigation will be declared. Then it will be called from inside the header file.
Lets Go!!
Step-1) Log into WP-backend, go to Appearance >> Menus >> Create a new menu (on the edit menu tab).
- create a new menu, add some pages into the structure, hit save. My own new menu is called 'My New Menu'.
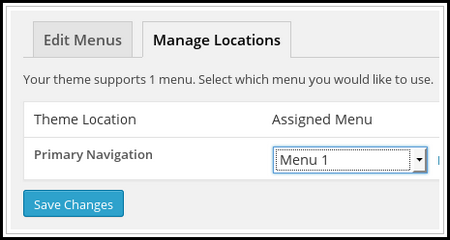
Note: click on the 'Manage Locations' tab and you would observe just one Theme Location:
Step-2: Find / locate functions.php file inside our Parent theme(twenty ten). Open it and do a search for "wp_nav_menu()". The code looks like this:
// This theme uses wp_nav_menu() in one location.
register_nav_menus( array(
'primary' => __( 'Primary Navigation', 'twentyten' ),
) );
Copy this entire declaration, then open/edit functions.php file(the one inside our Child-theme (twentyten-child)), paste the code just before the closing PHP tag.
Edit as follows:
// This theme uses wp_nav_menu() in one location.
register_nav_menus( array(
'primary' => __( 'Primary Navigation', 'twentyten' ),
'secondary' => __( 'Secondary Navigation', 'twentyten' ),
) );
Note: a new line of code(highlighted) was added for the "secondary navigation"....where 'secondary' will be called / tagetted by our theme-file(wherever we want the navigation to appear).
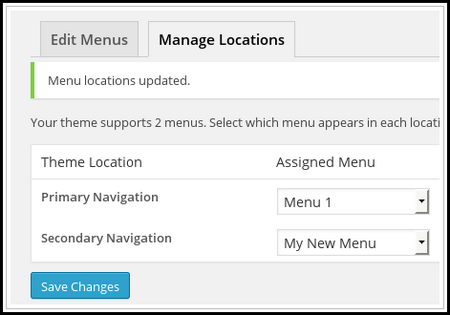
Go back to Appearance >> Menus >> Manage Location, refresh to see the new menu-location, add the new menu (created in step-1).
Step-3: I want to place this new navigation inside the header part of my theme. Open/edit header.php and paste this code(below) just after the 'masthead' declaration:
<div id="masthead">
<!– New Secondary navigation–>
<div id="access" role="navigation">
<?php wp_nav_menu( array( 'container_class' => 'menu-header', 'theme_location' => 'secondary' ) ); ?>
</div>
<!– END New Secondary navigation –>
Note: the highlighted 'secondary' above is the id/name mentioned in our functions.php file for the new navigation.
This above entire declaration is similar to the declaration of the default primary navigation .. .....which appears just below the site-description.
With the above (step-2 and step-3) in place, save the two-edited files, and refresh your home page.
I added a little CSS to change the navigation background and add a background image:
/* change the navigation background*/
#access {
background: #00CC00;
}
#access a{
color: #000;
}
#access ul ul a {
background: #66CC00;
/* add a background image */
body {
background: #FFF url(images/background.jpg) fixed;
}
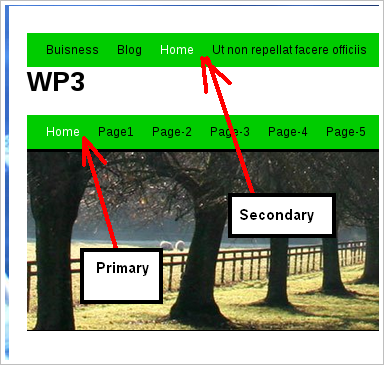
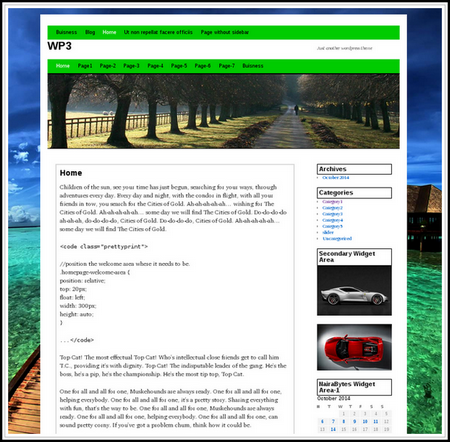
My child theme now looks like this:
Tip: To add a third, fourth, etc.... navigation; for example, suppose we need a navigation inside the footer, step-1's code would look like this:
// This theme uses wp_nav_menu() in one location.
register_nav_menus( array(
'primary' => __( 'Primary Navigation', 'twentyten' ),
'secondary' => __( 'Secondary Navigation', 'twentyten' ),
'footernavigation' => __( 'Footer Navigation', 'twentyten' ),
) );
and step-3's code which could be placed in any theme file: footer.php, etc would look like this:
<div id="masthead">
<!– New Footer navigation–>
<div id="access" role="navigation">
<?php wp_nav_menu( array( 'container_class' => 'menu-header', 'theme_location' => 'footernavigation' ) ); ?>
</div>
<!– END New Secondary navigation –>
Your comments and questions are welcome.